Create Theme Plugin
It is very convenient to develop plugin in Tailchat. We start from developing a theme plugin
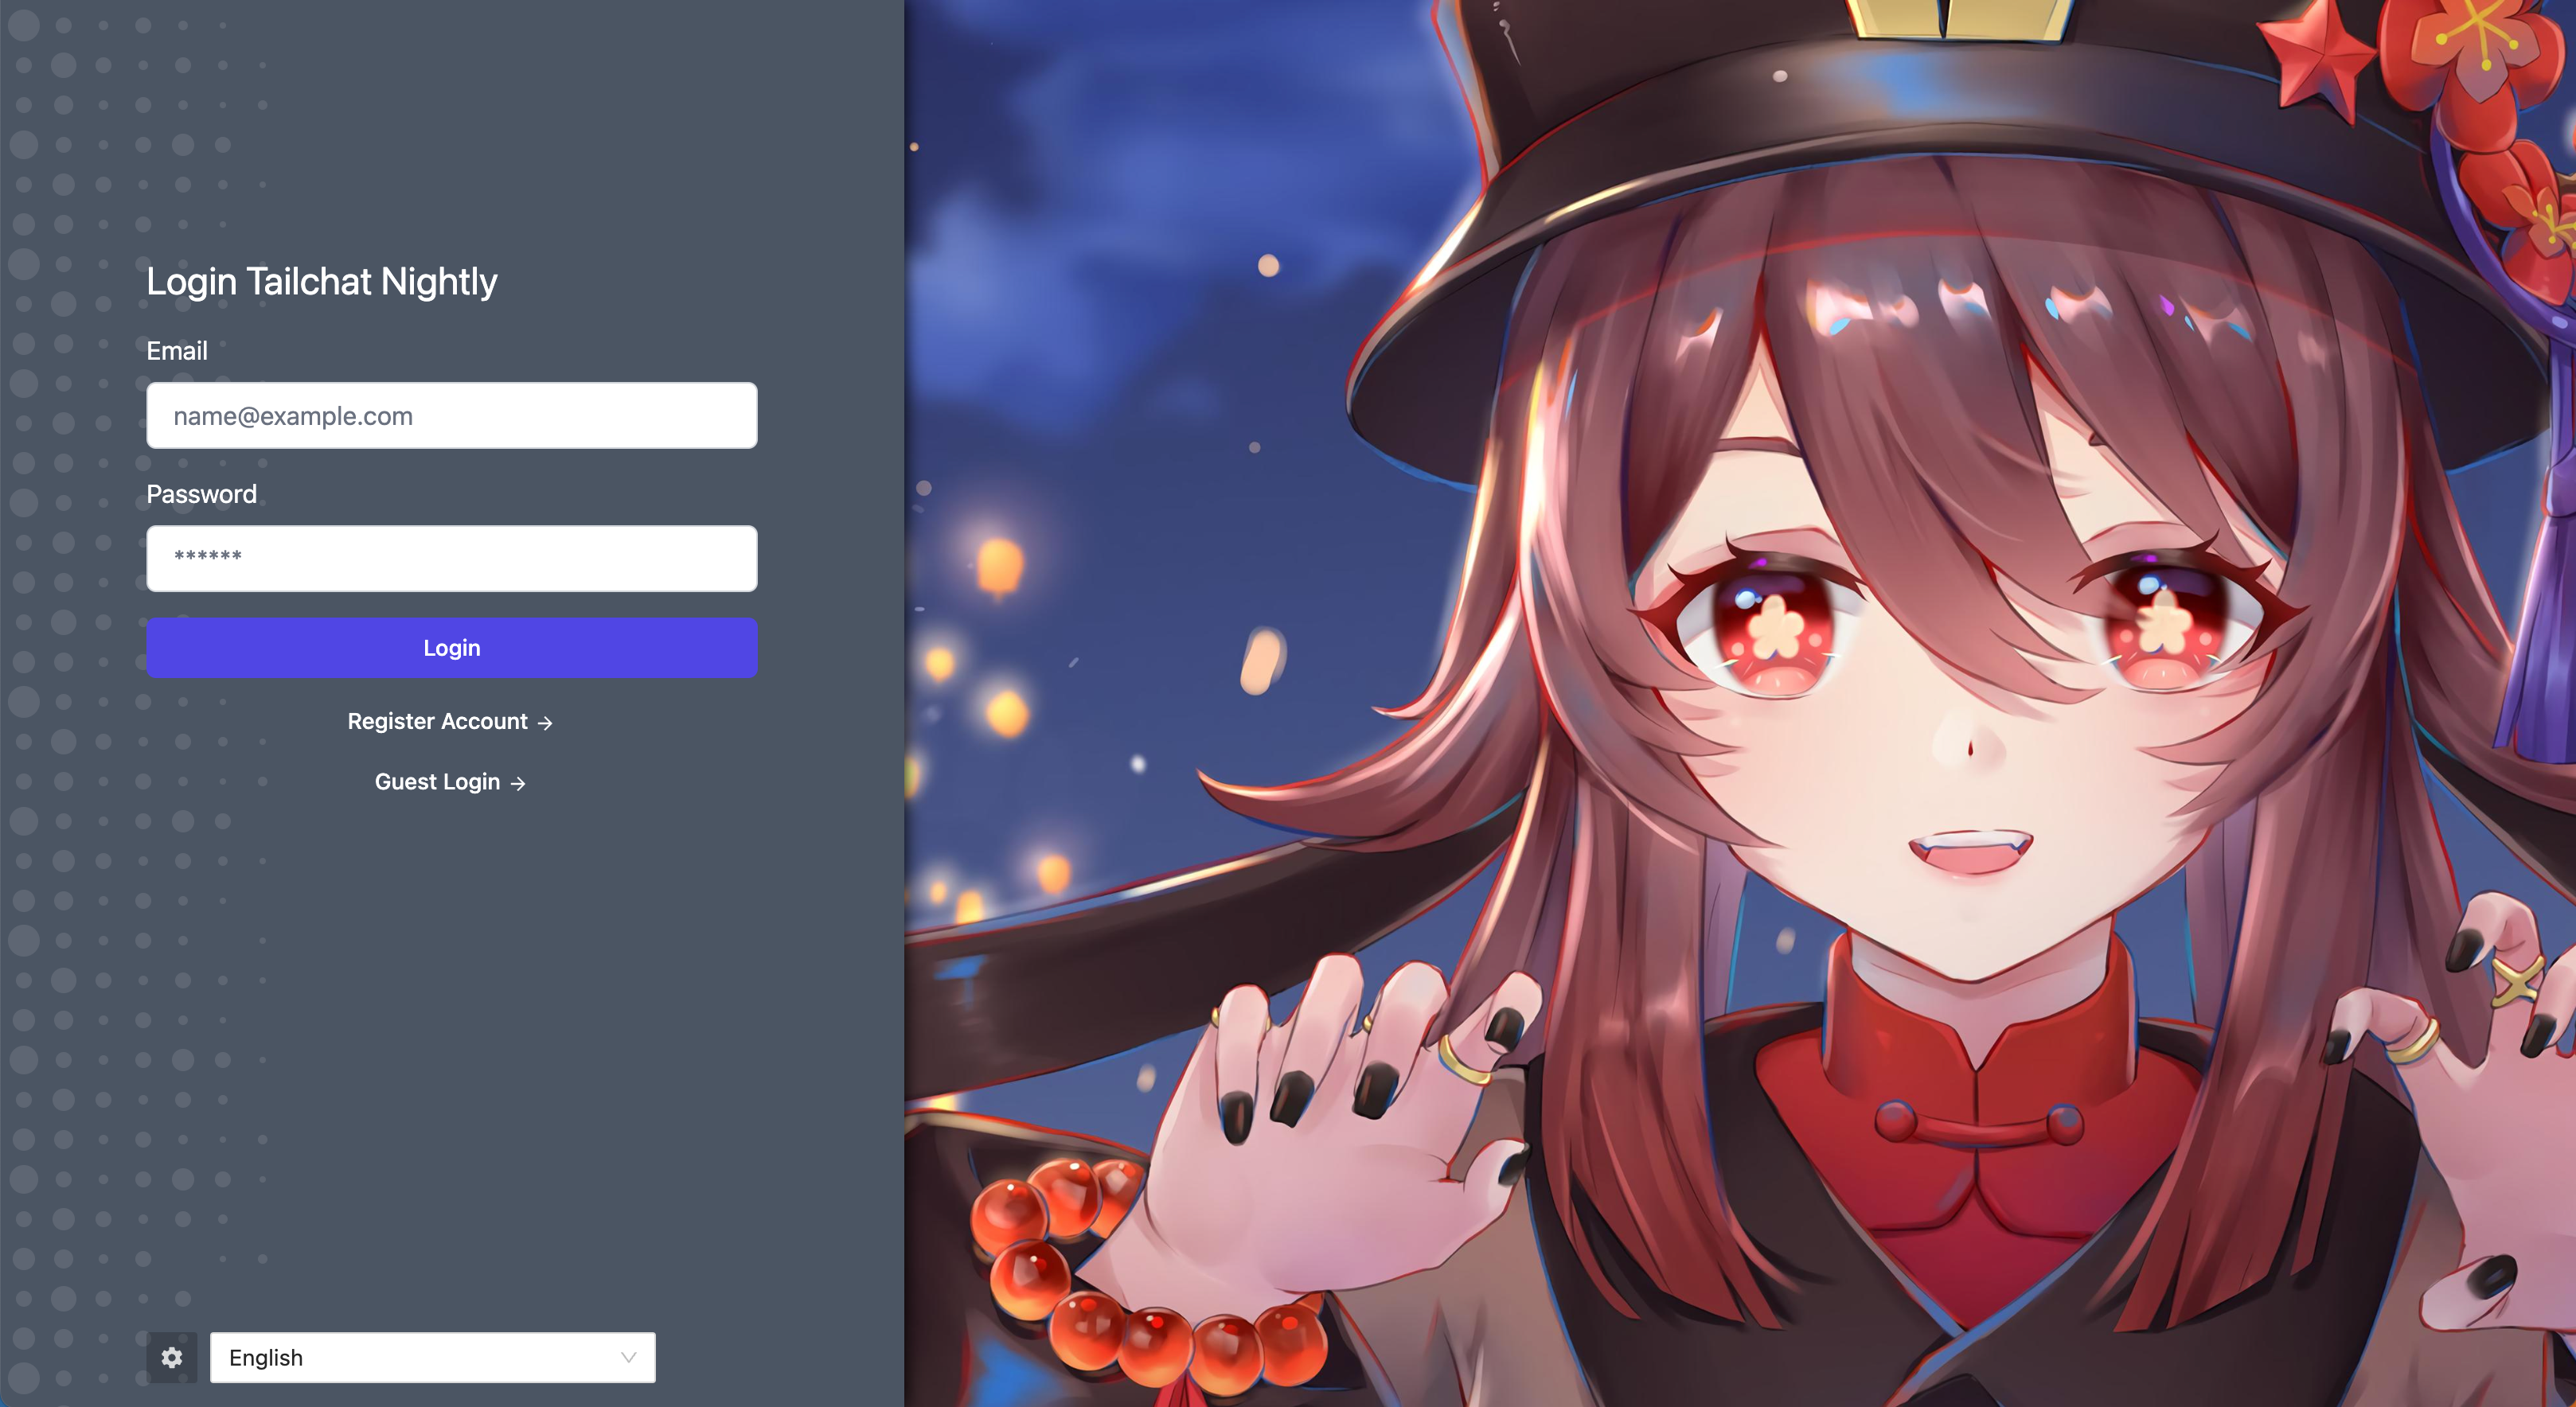
Final Effect
Create Plugin
If it is the first development, it is necessary to ensure that the plugin development environment has been initialized. Learn more
tailchat create --template client-plugin
Since the theme style is a pure front-end implementation, we choose the client-plugin template
Complete creation via interactive command line prompts
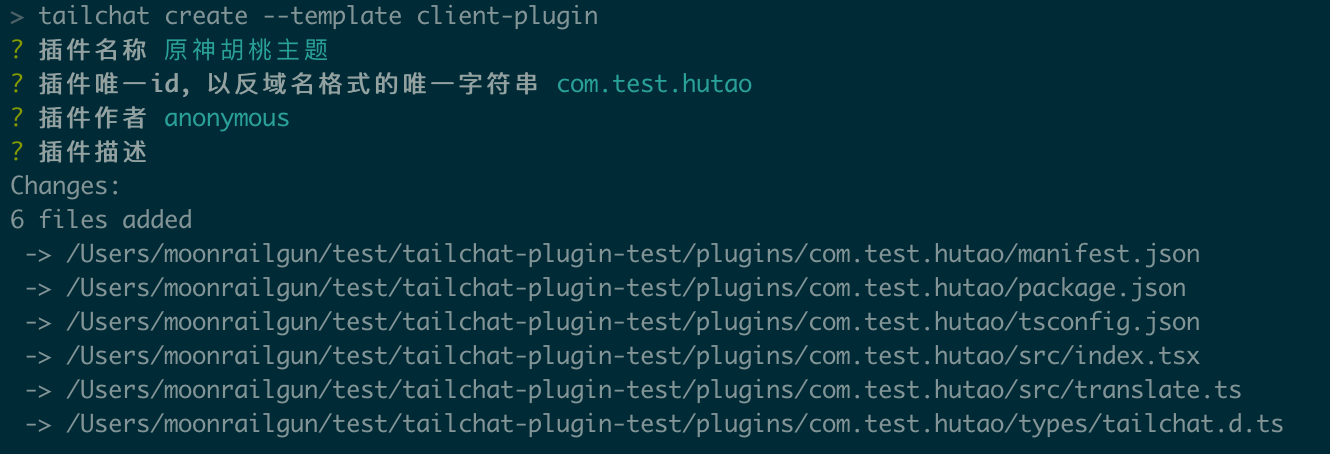
At this point the directory structure should look like this:
.
├── package-lock.json
├── package.json
├── node_modules
└── plugins
    └── com.test.hutao
        ├── manifest.json
        ├── package.json
        ├── src
        │   ├── index.tsx
        │   └── translate.ts
        ├── tsconfig.json
        └── types
            └── tailchat.d.ts
At this time we can start to compile the plugin immediately
npm run plugins:all
The compiled product will appear in /dist/plugins/com.test.hutao. By modifying the configuration of the `mini-star", it can allow it to output in other directory (this will be used in the service side development plugin).
Install plugin in Tailchat
For the frontend plugin, we need to provide the product with an HTTP static service, such as in local development, we can do this:
npx http-server .
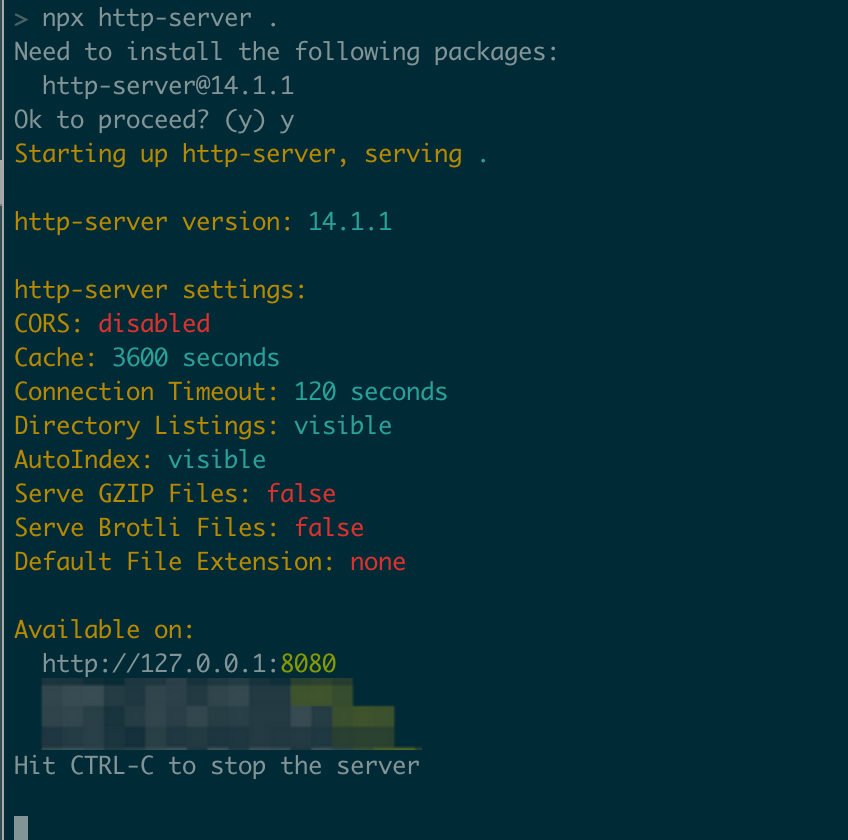
At this time we can access the results of our compilation through the address, such as http://127.0.0.1:8080/dist/plugins/com.test.hutao/index.js
A manual installation plugin is provided in Tailchat. We can install the plugin by manual install.
Copy the contents of plugins/com.test.hutao/manifest.json in the plugin directory, paste to the manual install plugin part.
Modify the URL as the real address that can be accessed. After clicking the Submit button, the installation command is automatically executed:

If the installation is prompted successfully, you can see the corresponding output when opening the console:

Here is the logic generated by the default in the plugin. The prompts that the plugin after the plugin is loaded, means that our plugin has been successfully installed.
Write style files and apply
Because we need to modify the theme style, we involve the processing of style files and static resources. Next, let's create the style of our theme first
Write in plugins/com.test.hutao/src/theme.less:
#tailchat-app.theme-genshin-hutao {
  @primary-color: #dd5545;

  --tc-primary-color: @primary-color;
  --tc-background-image: url(./bg.jpg);
  --tc-content-background-image: url(./avatar.png);
  --tc-content-background-image-opacity: 0.15;

  .bg-navbar-light {
    background-color: @primary-color;

    .bg-gray-400 {
      background-color: darken(@primary-color, 10%);
    }
  }

  .bg-sidebar-light {
    background-color: lighten(@primary-color, 20%);
  }

  .bg-content-light {
    background-color: lighten(@primary-color, 40%);
  }

  &.dark {
    --tc-primary-color: darken(@primary-color, 10%);

    .dark\:bg-navbar-dark {
      background-color: darken(@primary-color, 40%);
    }

    .dark\:bg-sidebar-dark {
      background-color: darken(@primary-color, 20%);
    }

    .dark\:bg-content-dark {
      background-color: @primary-color;
    }
  }
}
This style file has done three things:
- In the method of specifying the main color by the method of the
less variable, which greatly reduces the redundant code - In the background map of the
Tailchatbycss variable, mainly the background map and avatar of the login page - Stop at the root node
#tailchat-app.theme-genshin-hutaoselector to ensure that it will not pollute the global style.
Correspondingly, you need to put the bg.jpg and avatar.png as a static resource at the root node
In order for Tailchat to know that there is such a topic, we need to register the information related to this topic into Tailchat.
// plugins/com.test.hutao/src/index.tsx
import { regPluginColorScheme, sharedEvent } from '@capital/common';
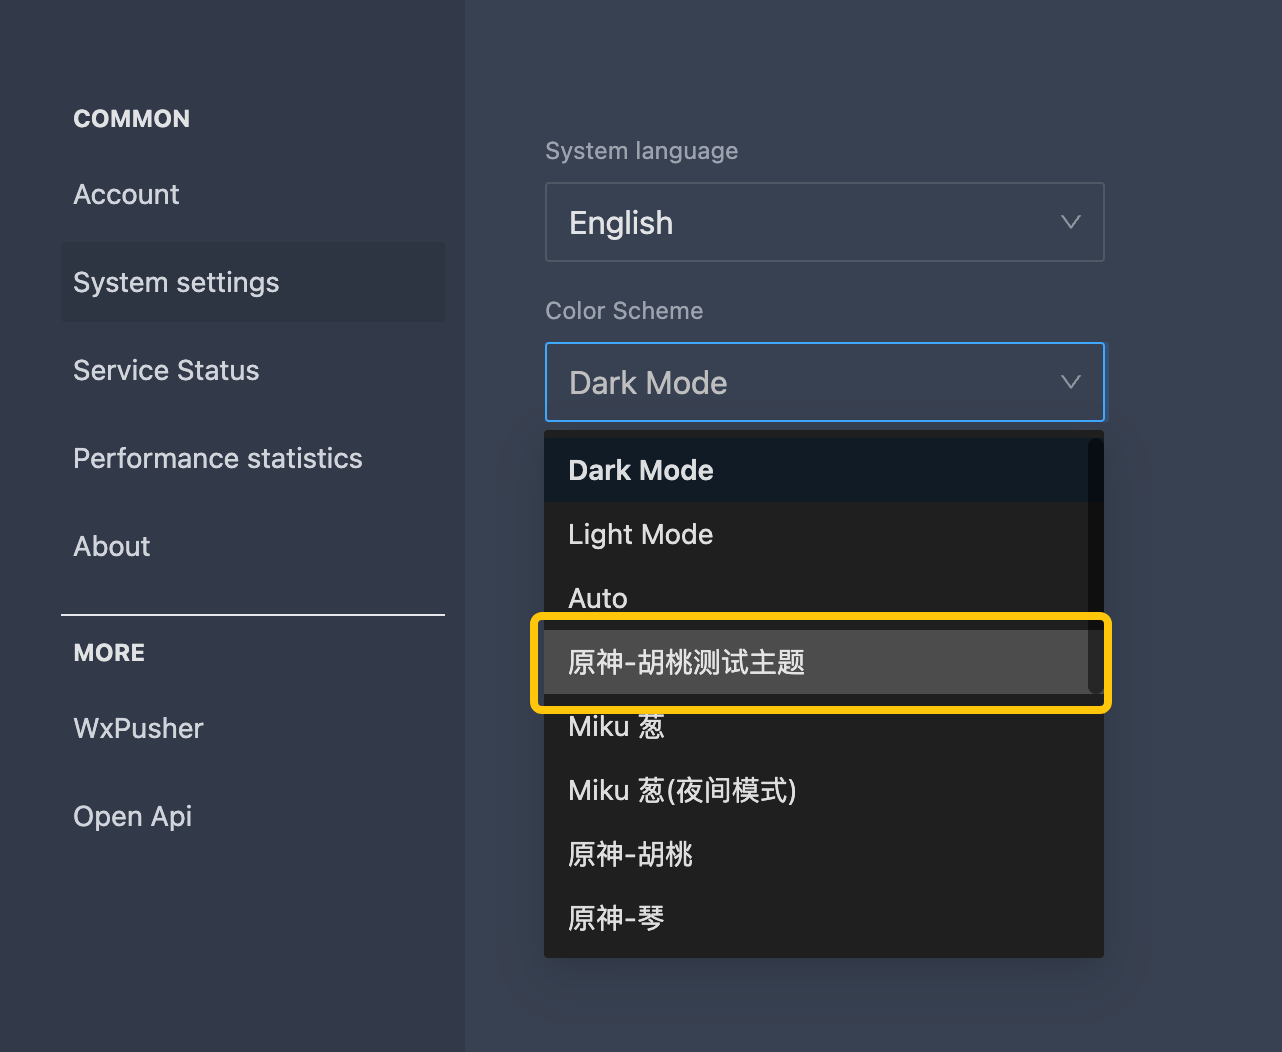
regPluginColorScheme({
label: '原神-胡桃测试主题',
name: 'light+genshin-hutao',
});
sharedEvent.on('loadColorScheme', (colorSchemeName) => {
if (colorSchemeName === 'light+genshin-hutao') {
console.log('正在加载胡桃主题...');
import('./theme.less');
}
});
This plugin does two things:
- Call
regPluginColorSchemeto register the theme life intoTailchat, so thatTailchatwill display the theme in the system settings.- It should be noted that the
nameof the theme is composed of<color>+<theme-name>, the default Tailchat will provideauto/light/darkthree color schemes, here it means to add a style override based on the bright color mode.
- It should be noted that the
- Listen to the theme loading event through
sharedEvent, if the color theme is our theme, then load the theme asynchronously (the purpose of asynchronous loading is to reduce meaningless network requests)
At this time, our compilation cannot pass, because the file of less type has not been processed yet
mini-star has already processed the less file by default, we only need to install the less package, and mini-star will automatically call the installed less to compile.
npm install less
At this time, execute npm run plugins:all to compile, and the final directory should be as follows:
.
├── dist
│   └── plugins
│       └── com.test.hutao
│           ├── index.js
│           ├── index.js.map
│           ├── theme-475203da.js
│           └── theme-475203da.js.map
├── package-lock.json
├── package.json
└── plugins
    └── com.test.hutao
        ├── manifest.json
        ├── package.json
        ├── src
        │   ├── avatar.png
        │   ├── bg.jpg
        │   ├── index.tsx
        │   ├── theme.less
        │   └── translate.ts
        ├── tsconfig.json
        └── types
            └── tailchat.d.ts
For ease of management, mini-star will directly package images in the format of base64 into the style file when processing the static resources referenced by less. Therefore, the theme file will be very large, which is why we need to load it asynchronously on demand.

Because we have installed the plugin we are developing in Tailchat before, so just refresh it directly.
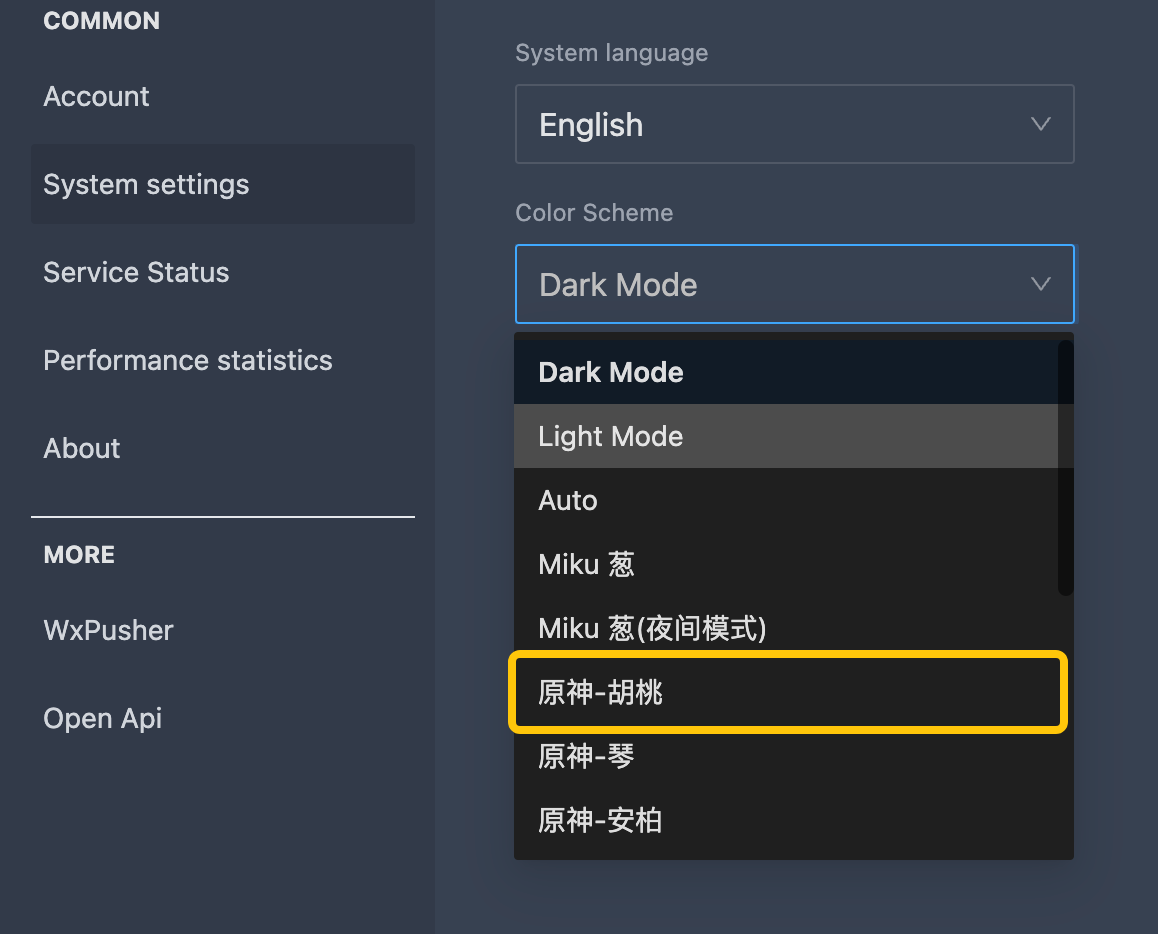
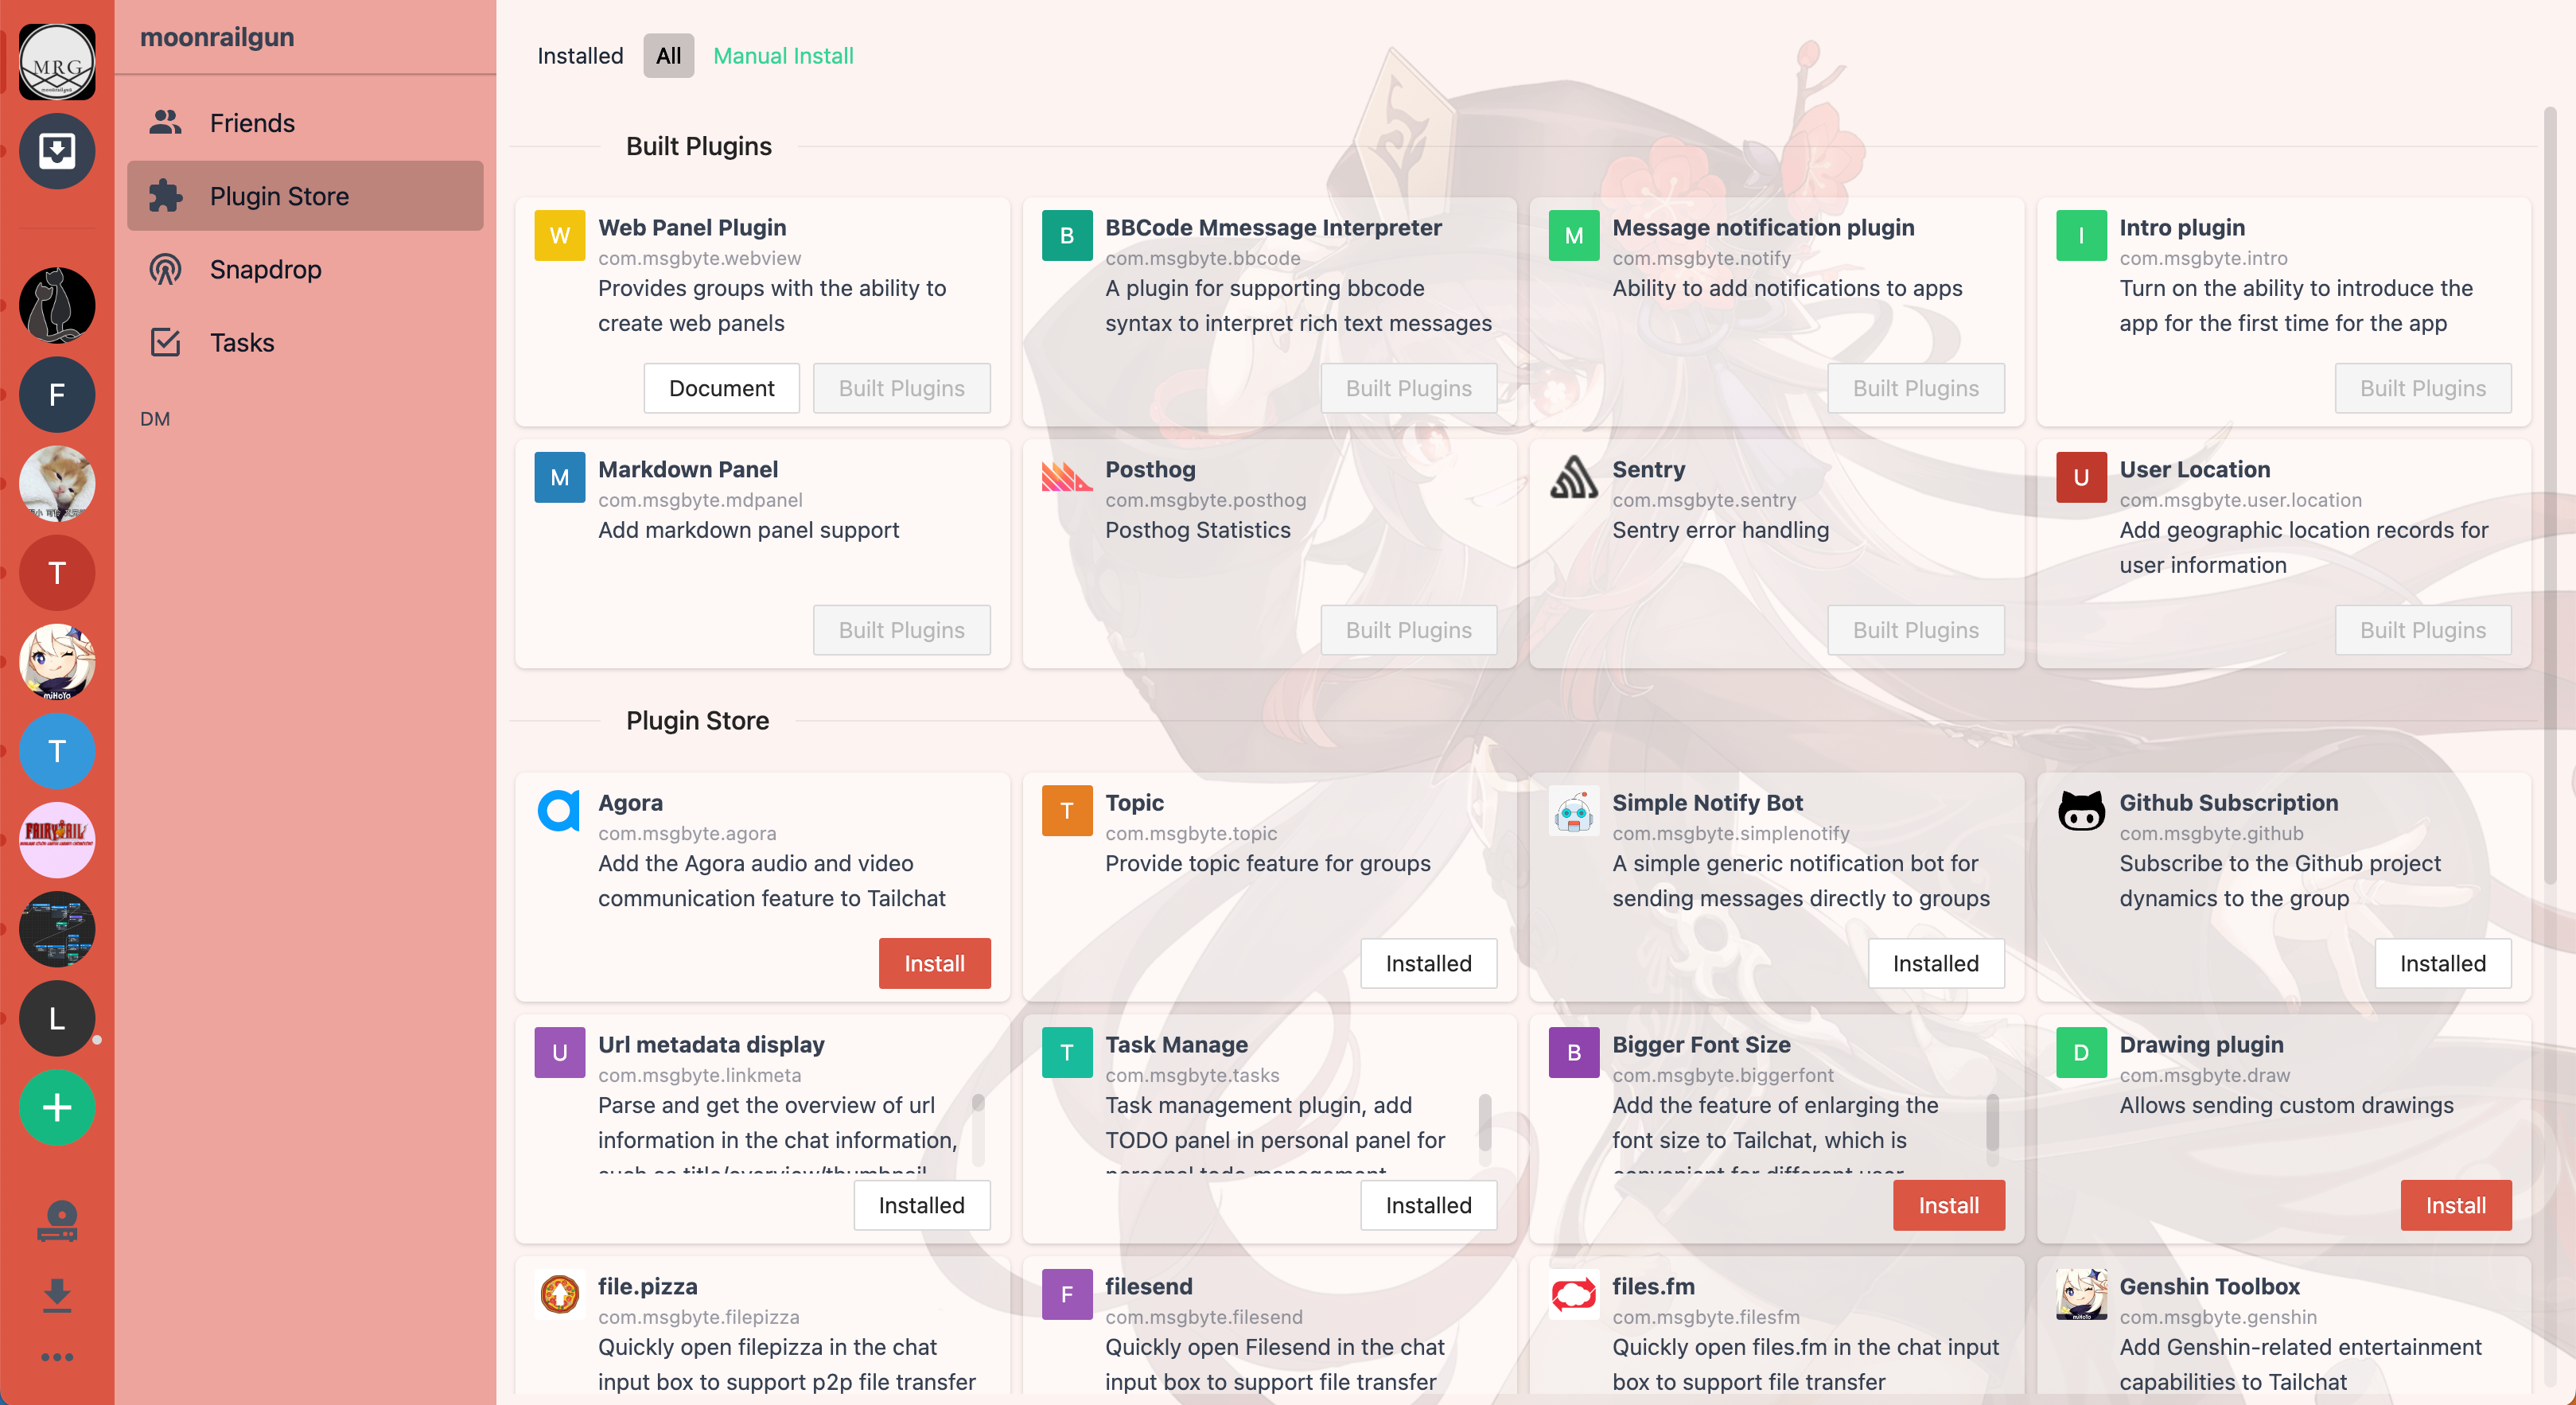
Click on the theme page of system settings in the setting menu in the lower left corner, and we can see our theme. Switch to the past and immediately the interface will become the theme style we want.
Reference
The official implementation of this theme can be accessed at https://github.com/msgbyte/tailchat/tree/master/client/web/plugins/com.msgbyte.theme.genshin View