
Introduction
Tailchat is an open source noIM(not only IM) application, in addition to the general instant messaging function, it also includes a complete open platform and plugin ecosystem. This time we will use the open platform of Tailchat.
Laf is an open source serverless cloud development that provides out-of-the-box application resources such as cloud functions, cloud databases, and cloud storage. This time we will use the cloud function provided by him.
Because both platforms are so convenient, it only takes us 10 minutes to develop a complete conversational bot.
TLDR
Create an open platform application
No nonsense, let's get right to work.
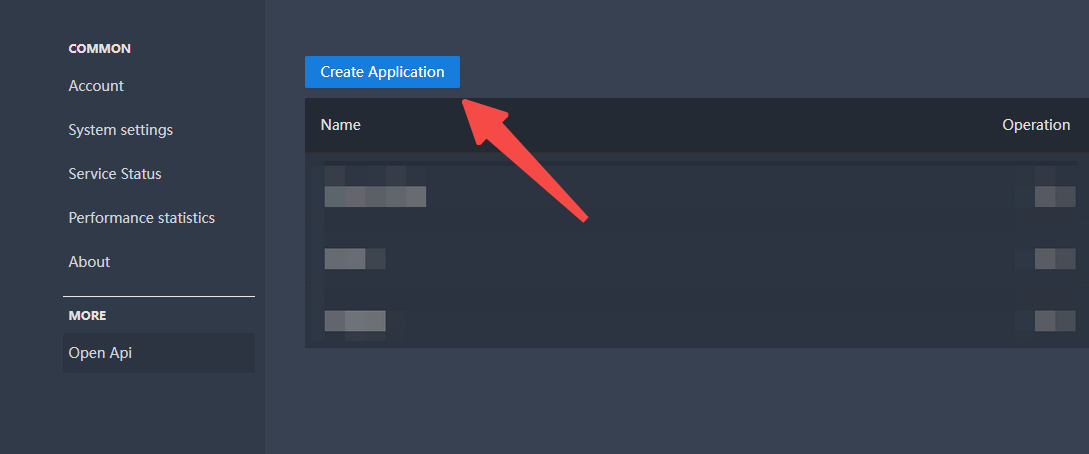
First of all, we need to create an open platform application in Tailchat's open platform.
Before creating, we need to install the relevant plugins, because the capabilities of Tailchat are encapsulated in different plugins, and some capabilities will not be visible if the plugins are not installed.
We need to install the open platform plugin (com.msgbyte.openapi) and third-party integration (com.msgbyte.integration) plugin
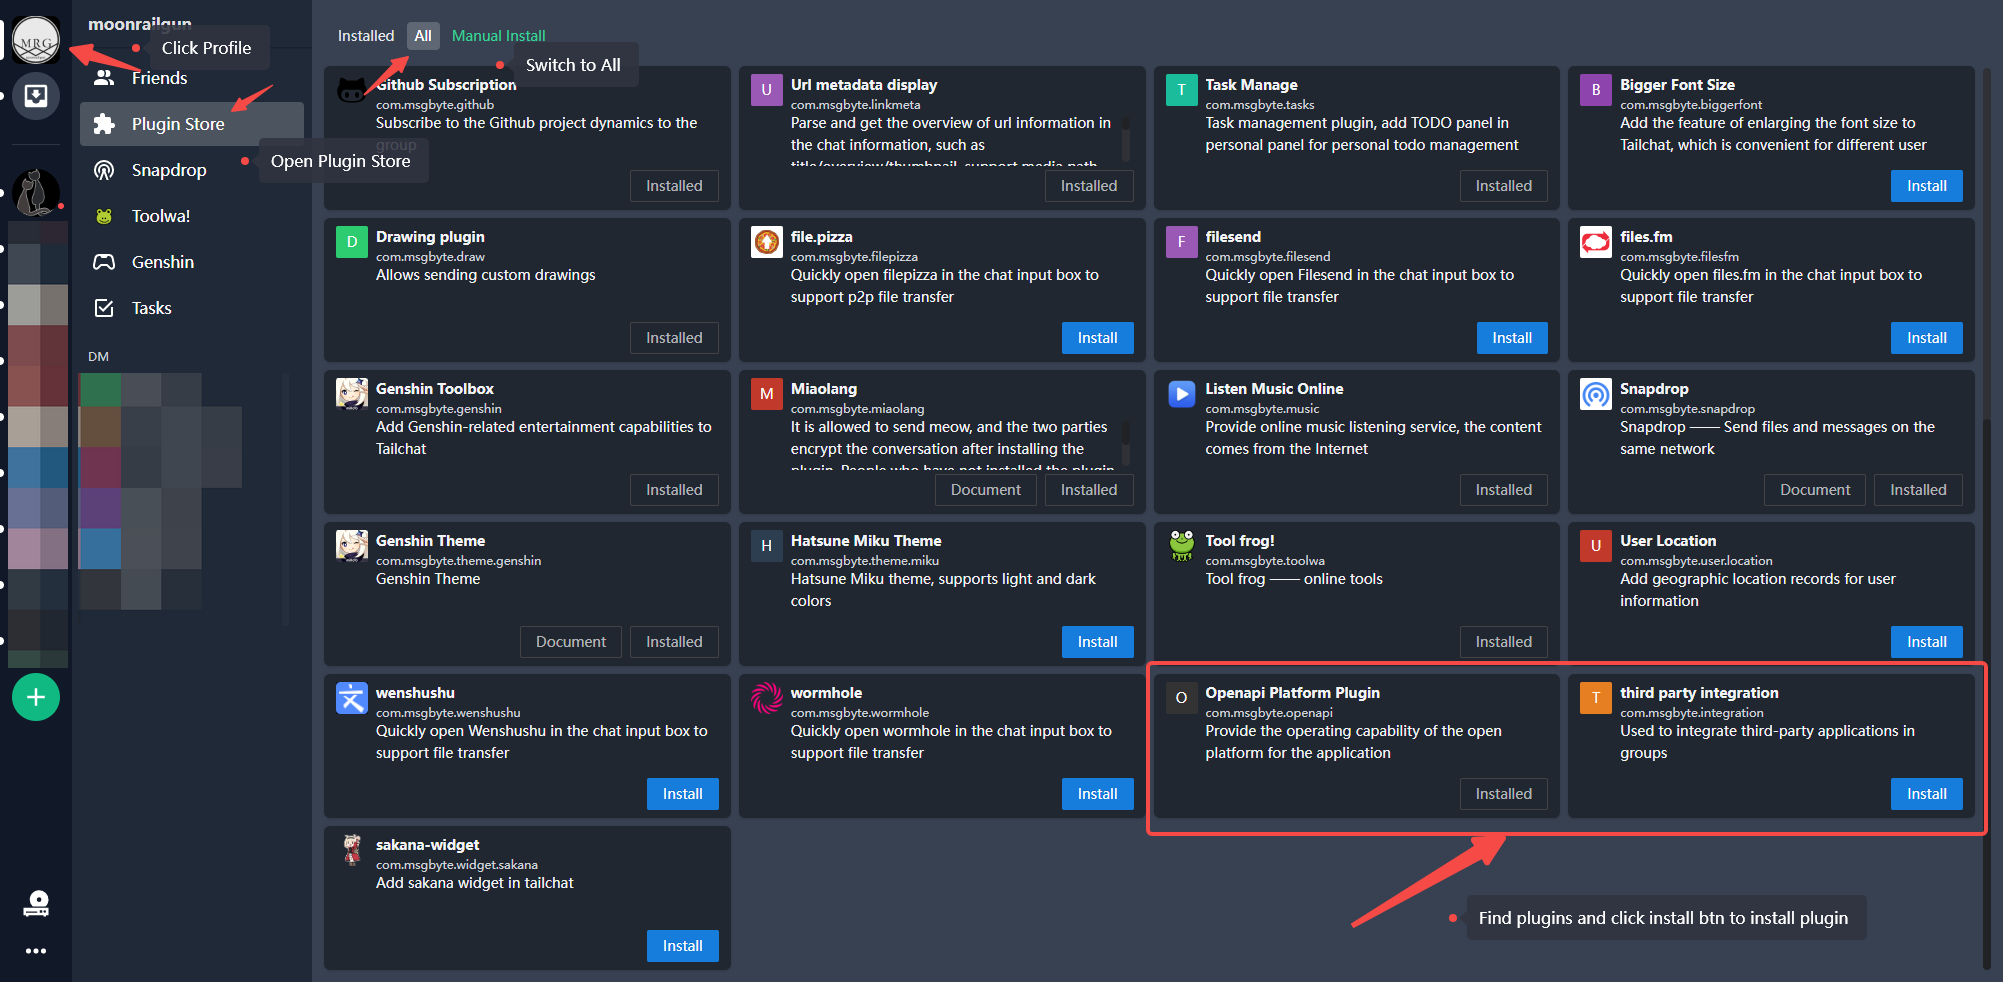
Then we can see our open platform plugin on the settings page in the lower left corner
Quickly create an application:
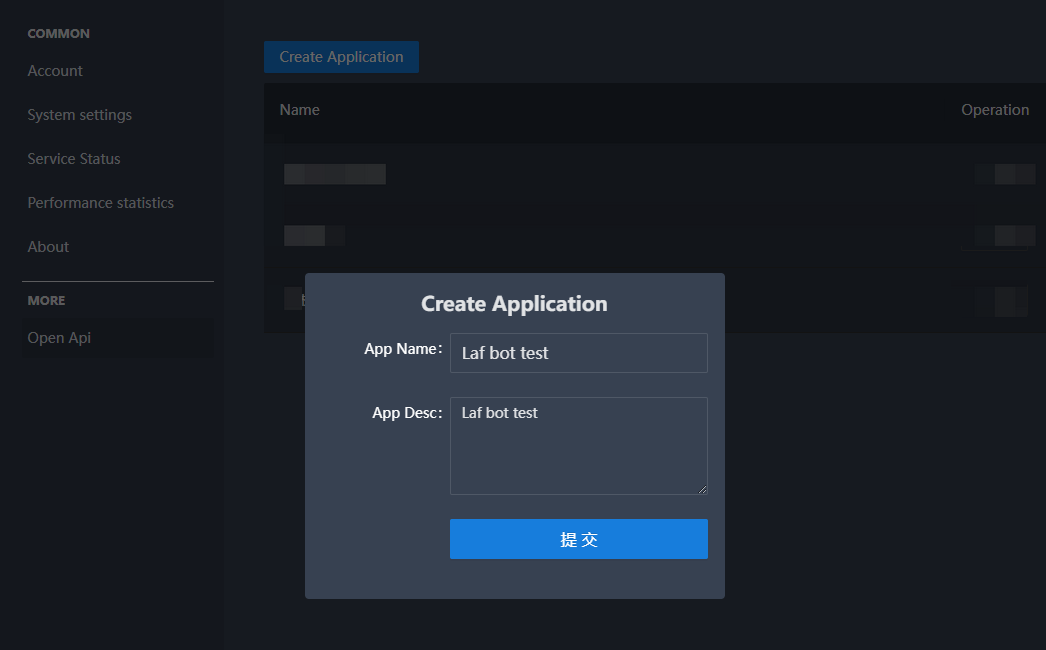
After creating, click Enter to enter the application details page.
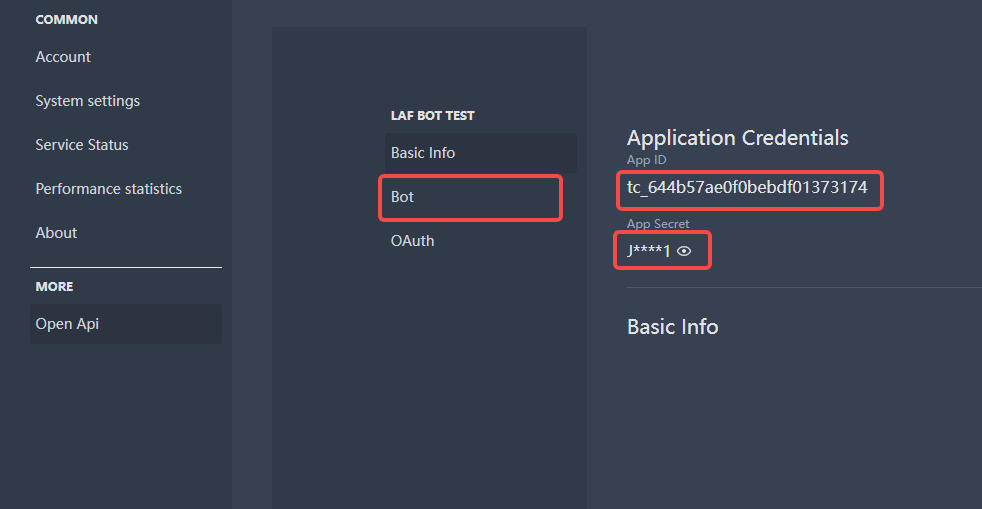
At this point we can get two things, one is appid used to identify the unique id of the app, and the other is appsecret used to interact with services. It can be simply understood as the account name and password of the open platform application.
Click on the little eyes to display the complete secret key without desensitization. These two fields we will use next.
Create laf cloud function
Next, let's create a cloud function for the background service of the robot.
First log in/register an account in laf and create an application.
Each account provides a free experimental application for a quick trial in laf, we can create a free one directly
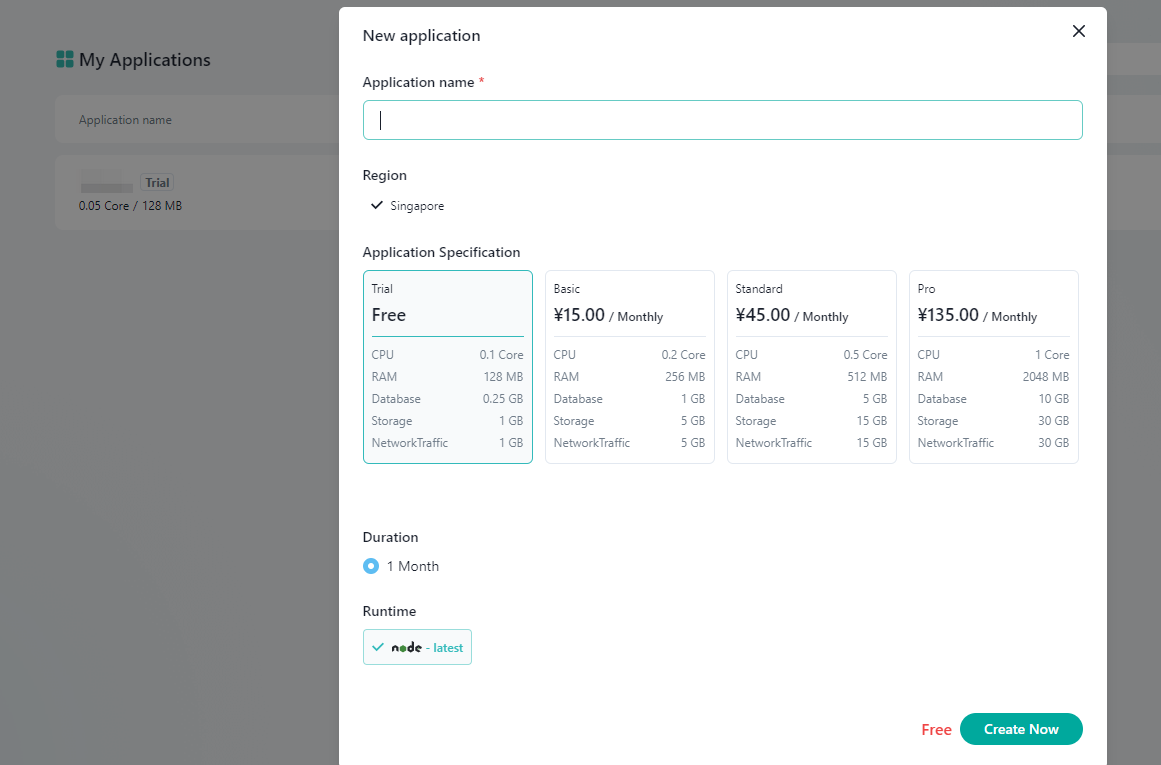
After the application is started, we can directly write code on the web page.
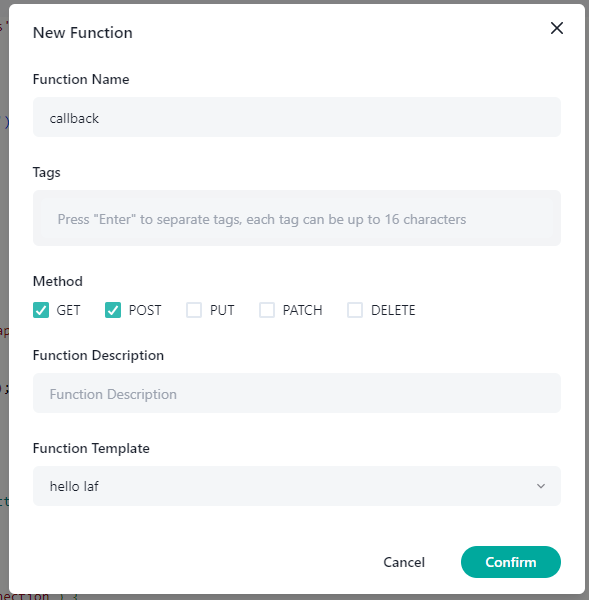
Click the plus sign in the upper left corner to create a cloud function
Install the tailchat-client-sdk package officially provided by Tailchat in the dependencies in the lower left corner for rapid development
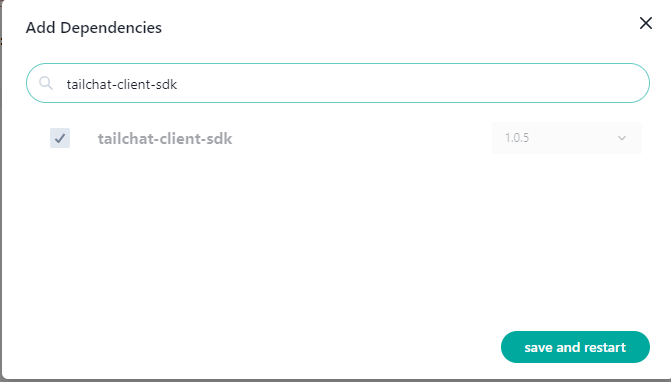
After clicking Save, the application will automatically restart, and your application is equivalent to installing this package. At this point, we can directly import it. If there is a typescript support in the package, the web editor will also have a type hint.
The click function quickly writes the following:
import { TailchatClient, stripMentionTag } from 'tailchat-client-sdk';

const host = '<your tailchat instance backend host>';
const appId = '<appId>';
const appSecret = '<appSecret>';

const client = new TailchatClient(host, appId, appSecret)

export async function main(ctx: FunctionContext) {
   console.log('receive', ctx.body);

   const type = ctx.body.type;
   if (type === 'message') {
     const payload = ctx.body.payload;
     try {
       const message = await client. replyMessage({
         messageId: payload. messageId,
         author: payload. messageAuthor,
         content: payload. messageSnippet
       }, {
         groupId: payload.groupId,
         converseId: payload.converseId,
         content: `Your message: ${stripMentionTag(payload. messageSnippet)}`,
       })

       console.log('send message success:', message)
     } catch (err) {
       console.log('send message failed:', err)
     }
   }

   return { data: 'hi, laf' }
}
Fill in the corresponding contents of host / appId / appSecret at the top of the code, where host is the address of the Tailchat backend you deployed yourself. If you are using the official nightly environment, you can directly fill in https://tailchat-nightly.moonrailgun.com
The logic of the code is very simple, it is to receive the message pushed from Tailchat, and reply the received content as it is.
After editing the code, click the publish button in the upper right corner to publish the code online, and you can also see that laf provides a url that can be accessed from the external network. This url needs to be recorded and we will use it later.

At this point, our robot service is complete.
Robot configuration
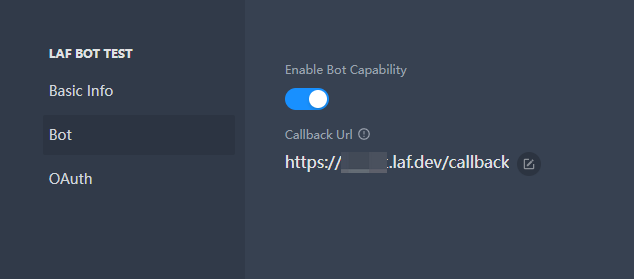
At this point we are back in Tailchat. We still have a few steps left.
Re-open the app details and switch to the Robots tab. Turn on the robot function and fill the url we got in laf into the callback address
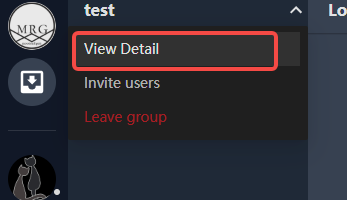
Then add our robot to the group, open the details in the upper left corner of the group
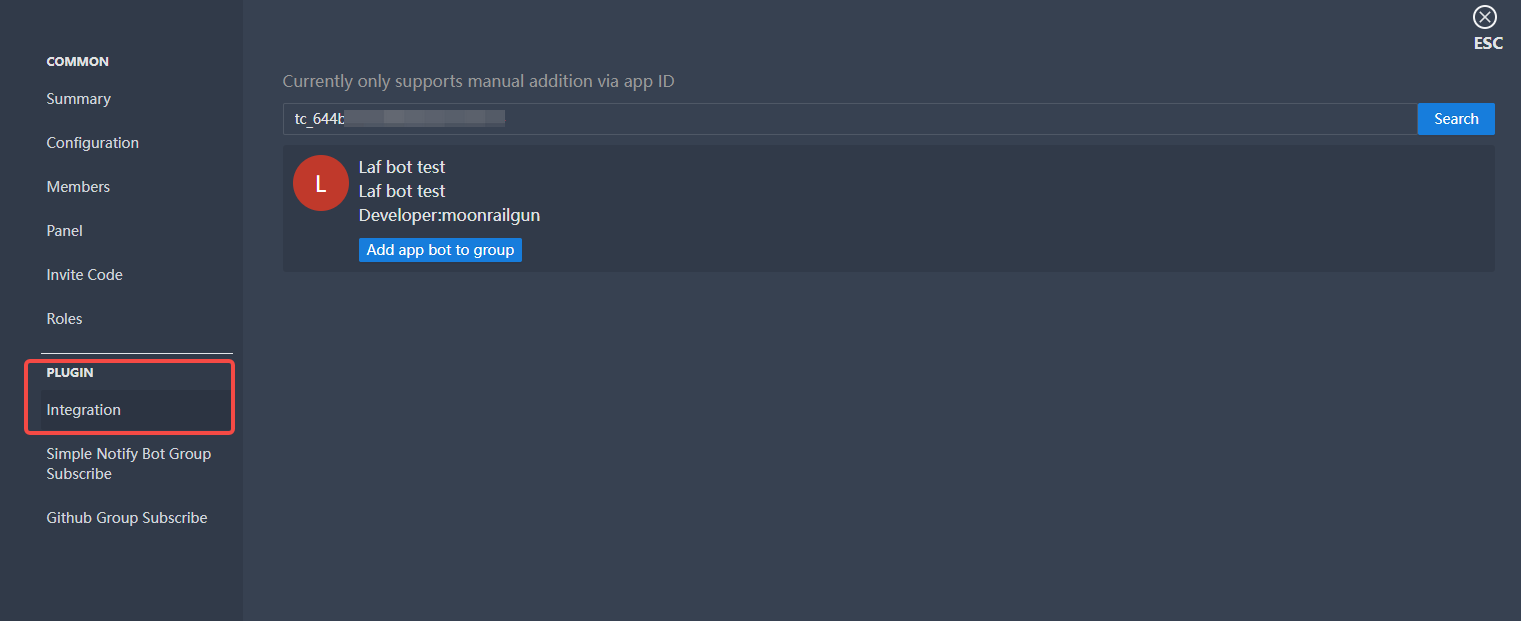
Find the integration function on the left, enter the appid to find the application, and click the Add robot to the group button.
At this time, after we @robot in the channel and input content, we can see that the robot has responded accordingly
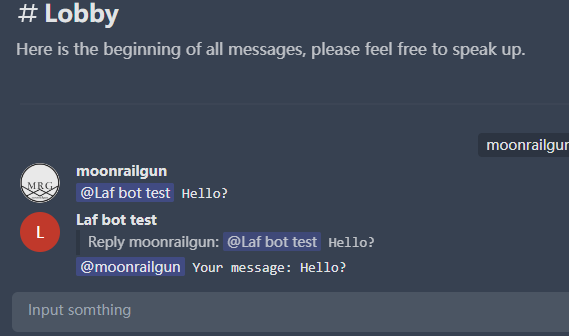
Since then, a simple conversational robot has been completed.
If you want other functions, you can directly modify the source code of the robot. Through bots we can connect Tailchat with various services.